Markbooks
Markbooks – Functionality and Options
The Markbooks page is available to all users. But access is determined by the type of users and/or the subject or classes relevant for that user.
As a Teacher in OneStudent you will only have access to Markbooks for the classes assigned to you by the Administrator.
As a Heads of Department, you will only have access to their relevant subject and classes, that the faculty you are Head of Staff for is associated with.
As a Administrators, you will have access to all classes.
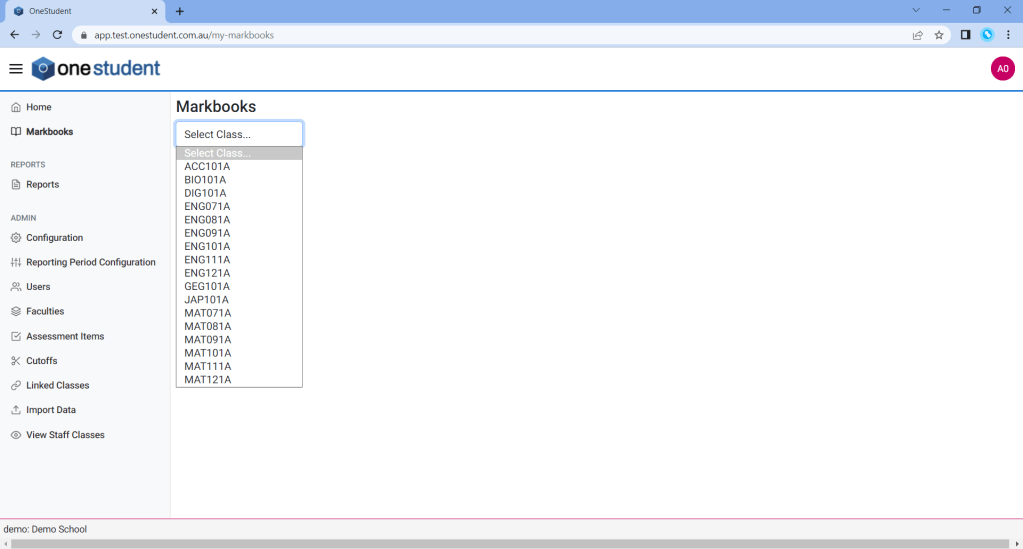
Only the classes the user has access to will be shown in the drop-down list, located at the top of the Markbooks page.
Example of OneStudent Markbooks page:
NOTE:
- The assignment of roles, faculties and classes is completed via the Import Data collection of data, which is undertaken by the Administrator.
- The Head of Staff responsibility is assigned on the Faculties – Manage Facilities on the individual Faculty Profile.
- The Assessment Items outlined in the Markbooks are configured by the OneStudent Administrators or Head of Department. The Assessment Items need to be configured prior to using the Markbooks.
Markbooks – Look & Feel
- From the Markbooks page.
- Select the relevant Class from Select Class drop down list.
- The Markbook is displayed, with all the student associated to that class listed.
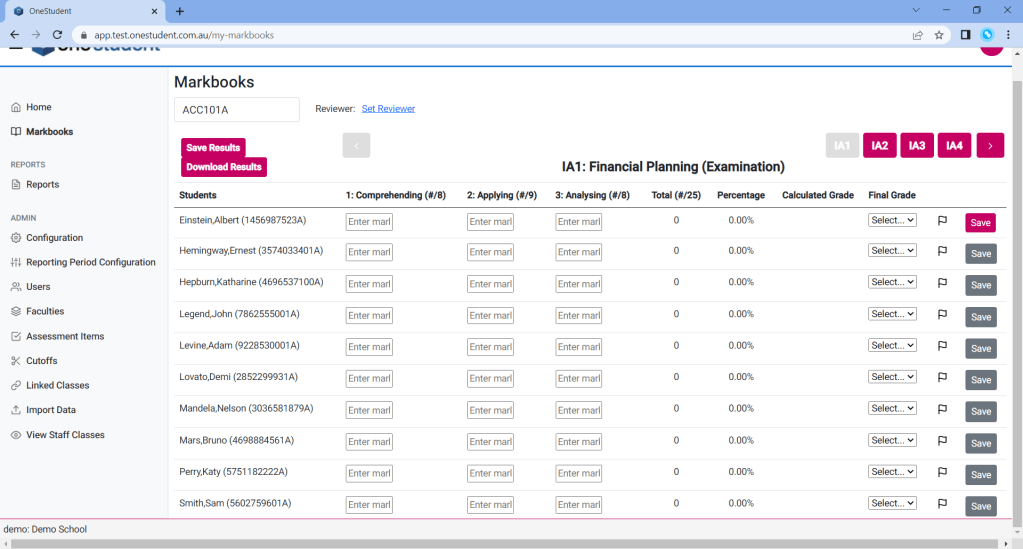
Let me explain what your seeing on the Markbooks page.
- Class Code – selected from the Select Class drop-down list.
- Reviewer – assigned a reviewer to that is not the assigned teacher or Head of Department. This is users for peer reviewing markbooks.
- Save Results – which allows you to save all results made to the markbook.
- Download results – download an csv file of the current results.
- Arrows – navigation, this allows you to move between the different Assessment items assigned to this class by the Administrator. Assessment items are created by the Administrator for each subject, and can have assessment item assigned for the entire year. This navigation allows the user to move between those different assessment items.
- Markbook – The remainder of the page is the markbook, this is where the academic marks are recorded. Markbook will differ depending on the options selected for the individual assessment item, but he columns Students, Calculated Grade, Final Grade, Note and Save are always available.
Example of OneStudent Markbooks page with Class selected, tab 1 (IA1):
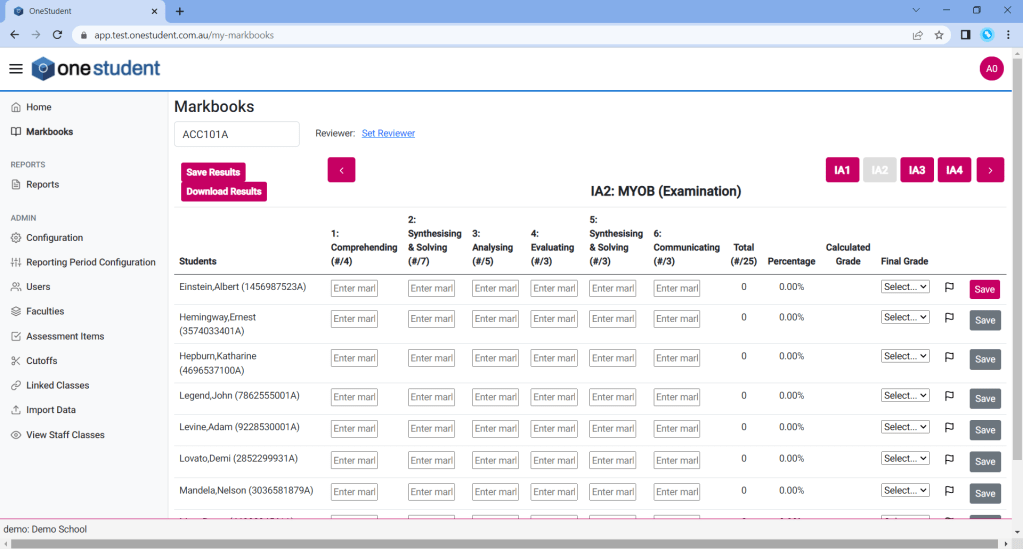
Example of OneStudent Markbooks page with Class selected, tab 2 (IA2):
Markbooks – Modifications
Markbooks are modified by recorded academic results.
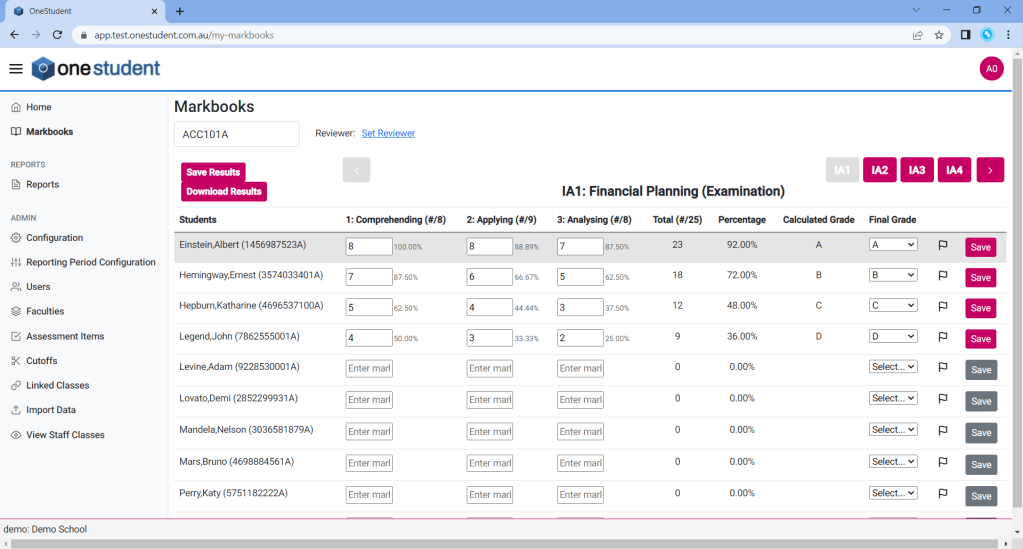
The data required to be entered will depend on the Assessment Items assigned to this class. For example, if an Assessment Item is based on Percentages, then you would see the percentages adding up on the screen as you enter data. If Calculated Grade is configured than you will see a recommended grade displayed as you enter data.
Example of OneStudent Markbooks page with Class selected (ACC101A), tab 1 (IA1) and data entered (Top 4 rows), data is entered but not saved:
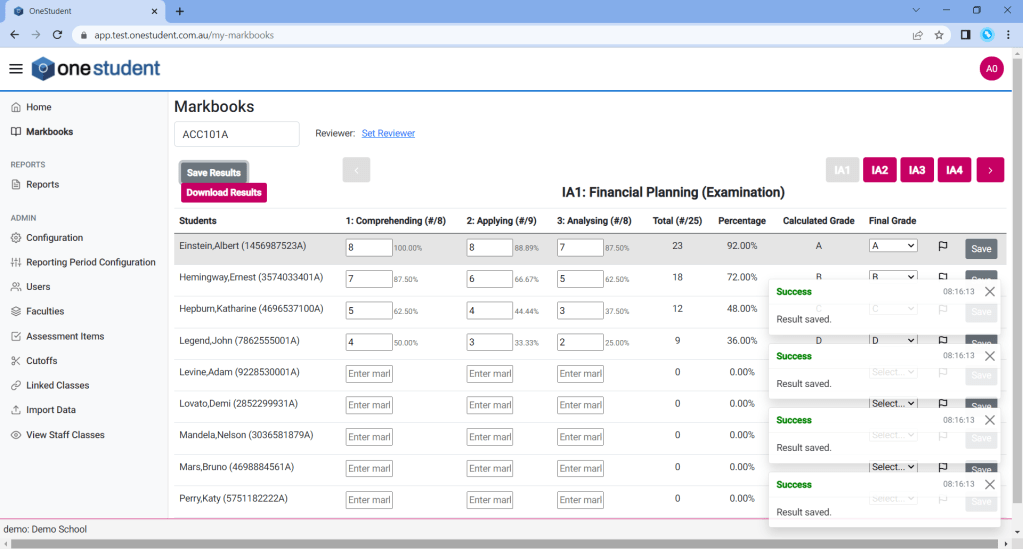
Example of OneStudent Markbooks page with Class selected (ACC101A), tab 1 (IA1) and data entered (Top 4 rows), data is entered and saved with Success messages displayed:
Example of OneStudent Markbooks page with Class selected (ACC101A), tab 1 (IA1) and data entered (Top 4 rows), data is captured:
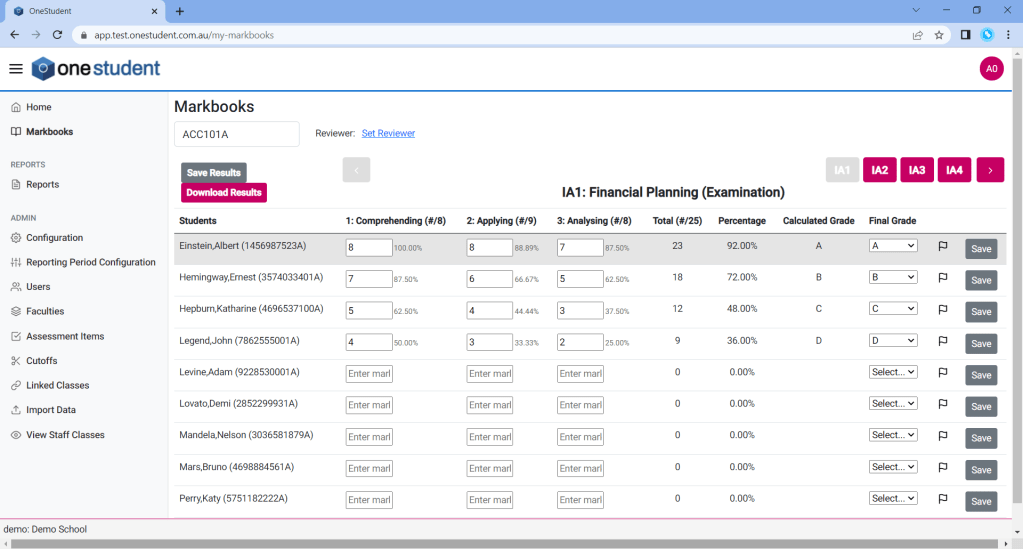
When entering academic results you will need to select a Final Grade, this can be the same or different to the calculated grade.
You can also add notes using the flag, and by doing so the flag will be displayed as Blue indicating to others there is a note.
You will notice that the Save button at the end of the results row changes colour, this is indicating that the results have not been saved. So once the results are completed you can either select to save using the save button or Save results button at the top left of the page. The save results is handy when you have made multiple changes. When the saved, OneStudent will display a success message to indicate the changes have been recorded.
To Modify Markbooks:
- From the Markbooks page.
- Select the relevant Class from Select Class drop down list.
- The Markbook for the selected Class will be displayed.
- If required navigate the required tab using the arrows at the top right.
- Enter results as required.
- Enter notes as required.
- Enter Final Grade as required.
- Select Save or Save Results.
- OneStudent will display a success message to indicate the changes have been recorded.
