Functionality and Options
Lets look at the functionality and options in OneStudent.
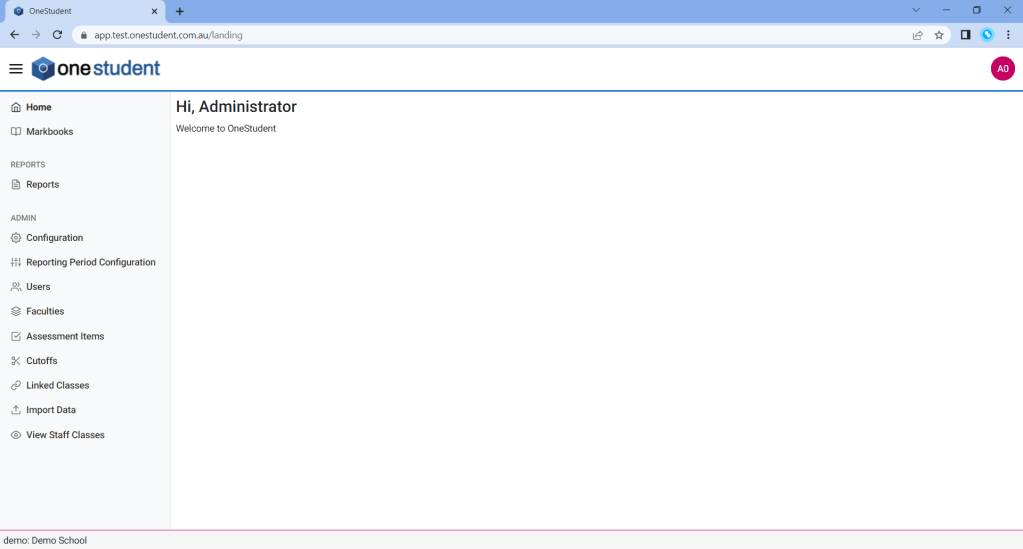
HOME
The Home page is the default display when login into OneStudent, you can then use the left-hand navigation to select the relevant functionality option required.
Example of OneStudent – Home page:
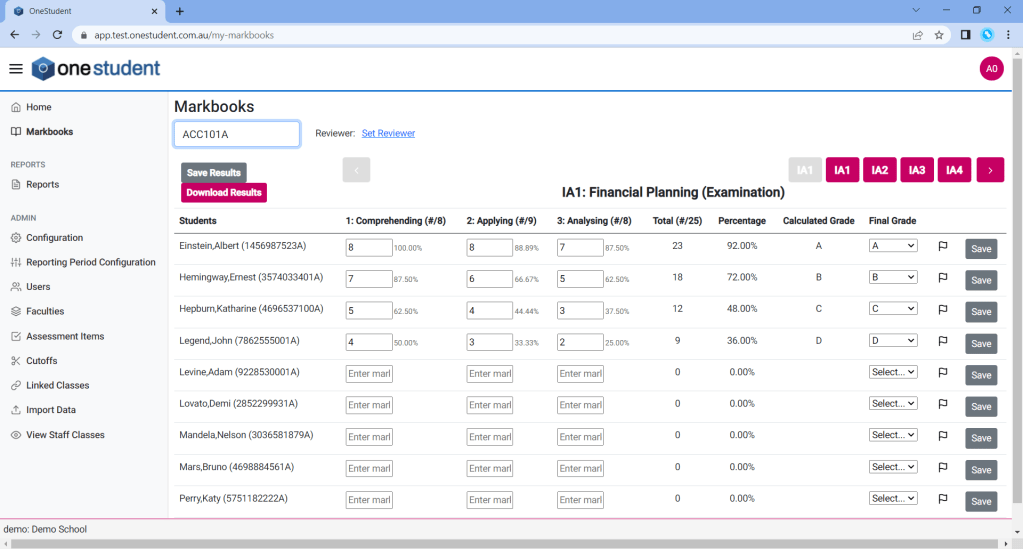
MARKBOOKS
The Markbooks page allows Teachers to enter the marks for their class for each assessment item and criteria. The final grade for each assessment item is calculated based on the marks entered.
The Markbooks page is available to all users, however Heads of Department and Teachers only have access to their relevant subject and classes. Only the classes they have access to will be shown in the drop-down list.
To clarify:
- Teachers – will only see classes that they have been assigned via the timetable.
- Head Of Departments – will only see classes that are in the faculty that the Head of Department has been assigned responsible over.
- Administrators -will have access to all classes.
Example of OneStudent – Markbooks page:

Example of OneStudent – Markbooks page with a Class selected:
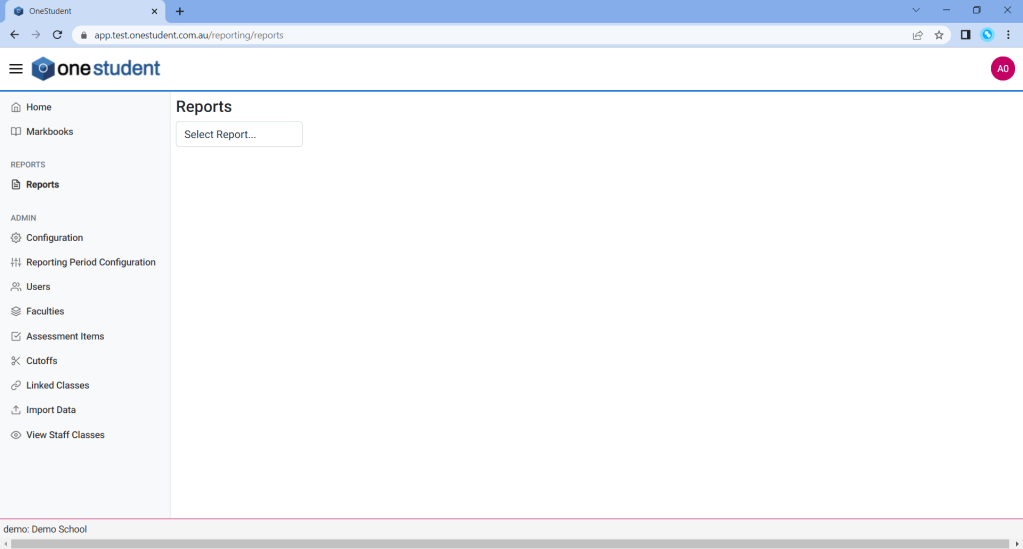
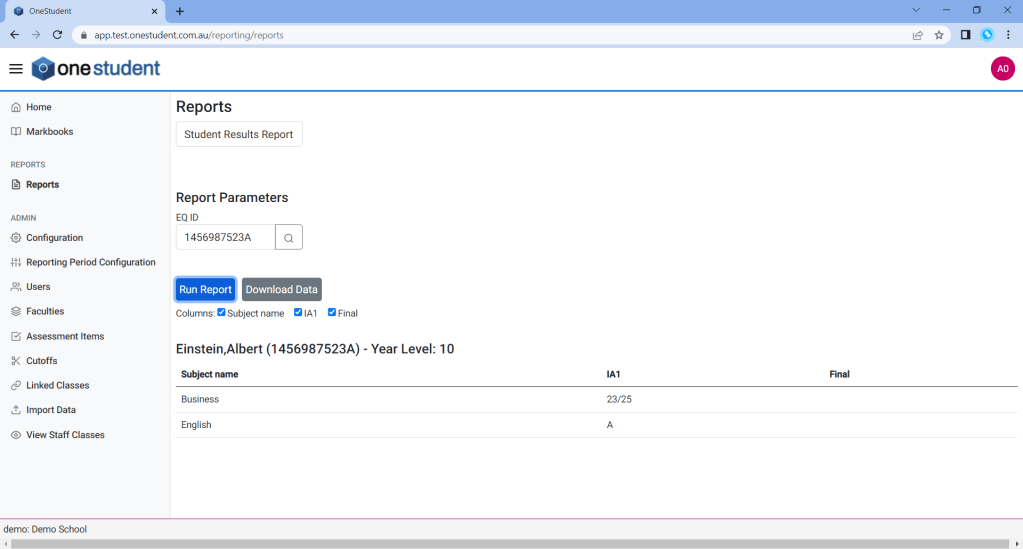
REPORTS
The Reports page allows reports to be run based on the marks entered via the Markbooks.
The current list of Reports within OneStudent are:
- QCAA Upload,
- HOD Assessment Report,
- Student Results Report,
- Assessment Criteria Report, and
- Academic Cumulative Report
The Reports page is available to all users, however not all Reports are available to all users.
Example of OneStudent – Report page:
Example of OneStudent – Report page with Report and Report Parameters selected:
ADMIN
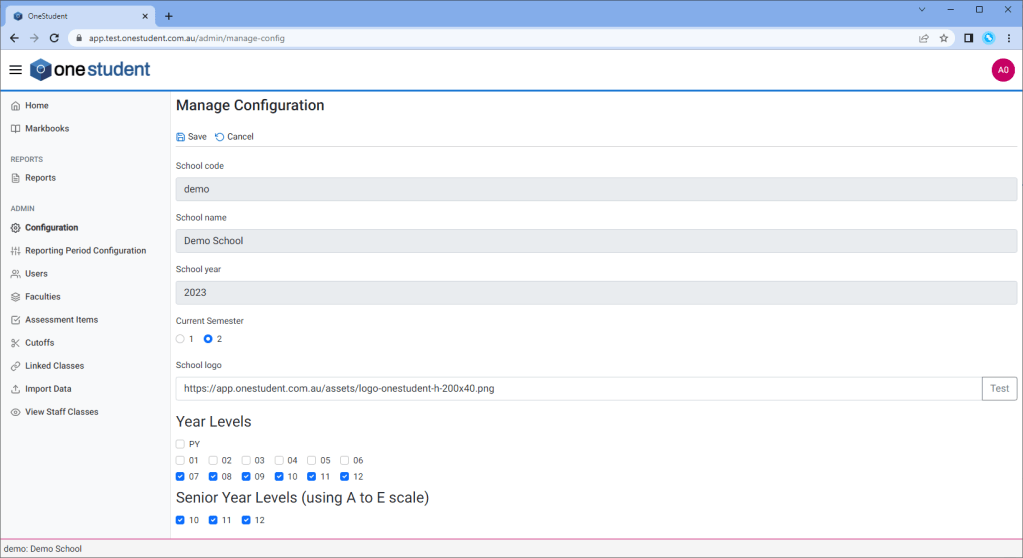
Configuration
The Configuration – Manage Configuration page allows the Administrator user to configure various settings for the school. For example, the School Code, the School Name, add a Logo and select the Year Level OneStudent will be used for.
Example of OneStudent – Configuration – Manage Configuration page:
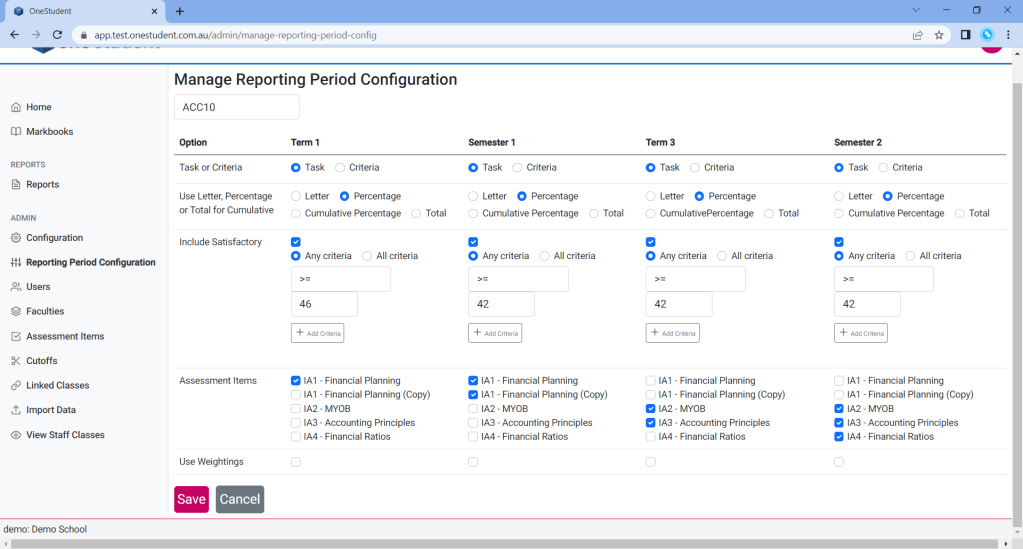
Reporting Period Configuration
The Reporting Period Configuration – Manage Reporting Period Configuration page allows the Administrator or Head of Department to define the academic reporting requirements for each subject for the entire year.
The Reporting Period for each subject is divided into term 1, semester 1, term 3, semester 2.
The options for each subject are then defined. For example,
- Are the Assessment item for this term or semester a Task or a Criteria?
- Are the end grade going to be based off a Letter, a Percentage or a Total Cumulative Percentage?
- What Assessment are required by the end of this reporting period, for the student to pass?
The Reporting Period Configuration data is related to the Academic Cumulative Report, how the Manage Reporting Period Configuration it is set will affect how that report works.
Example of OneStudent – Reporting Period Configuration – Manage Reporting Configuration page:

Example of OneStudent – Reporting Period Configuration – Manage Reporting Configuration page:
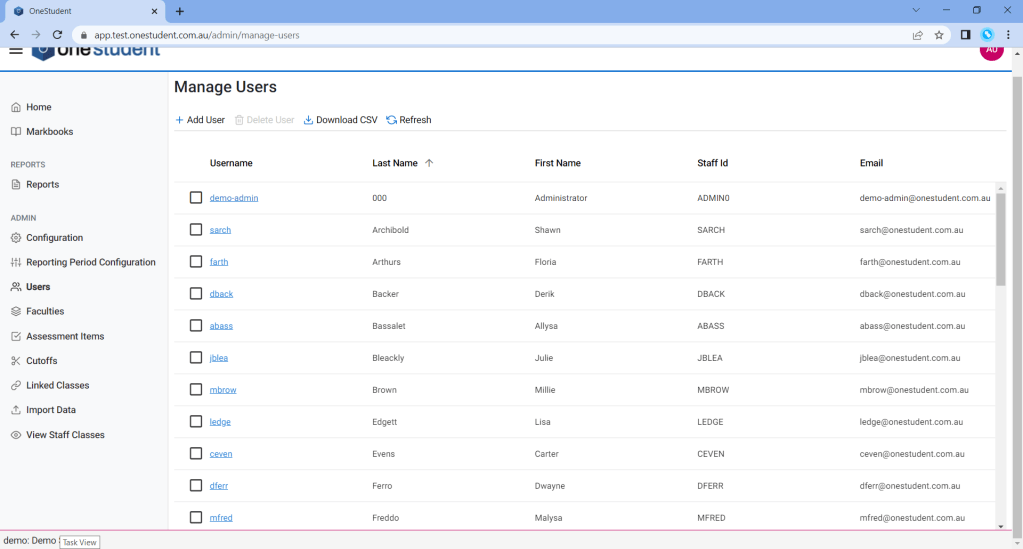
Users
The User – Manage User page allows the Administrator to manage the list of users that have access to OneStudent. For example, updating email addresses for an to individual users, or deleting a user that is no longer part of the school faculty.
The options available are:
- Add User, this option is recommended when first set up OneStudent prior to uploading Staff Import.
- Delete User.
- Download CSV, this can be used to make bulk updated and can be uploaded via the Import Data page.
- Selecting on the individual user to display their user profile.
- User type roles can be assigned on the individual user profile.
Example of OneStudent – Users – Manage Users page:
Example of OneStudent – Users – Manage Users page with a User selected (User Profile):

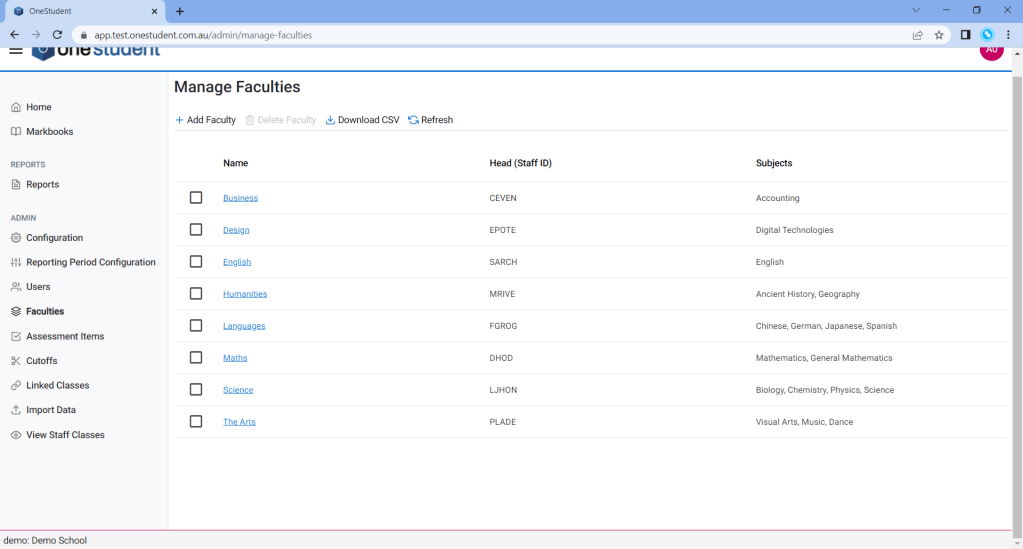
Faculties
The Faculties – Manage Faculties page allows the Administrator to manage the list of faculties at the school. For example, assigning the Head of Departments to their individual faculties or deleting a faculty that is no longer offered at the school.
The options available are:
- Add Faculty.
- Delete Faculty.
- Download CSV, this can be used to make bulk updated and can be uploaded via the Import Data page.
- Selecting on the individual faculty to display the faculty profile.
The Faculty Profile is where the Head of Department is assigned, plus the relationship between subjects and departments are defined.
Example of OneStudent – Faculties – Manage Faculties page:
Example of OneStudent – Faculties – Manage Faculties page with Faculty selected (Faculty Profile):

Example of a Production environment with an extensive list – Faculties – Manage Faculties page with Faculty selected (Faculty Profile)

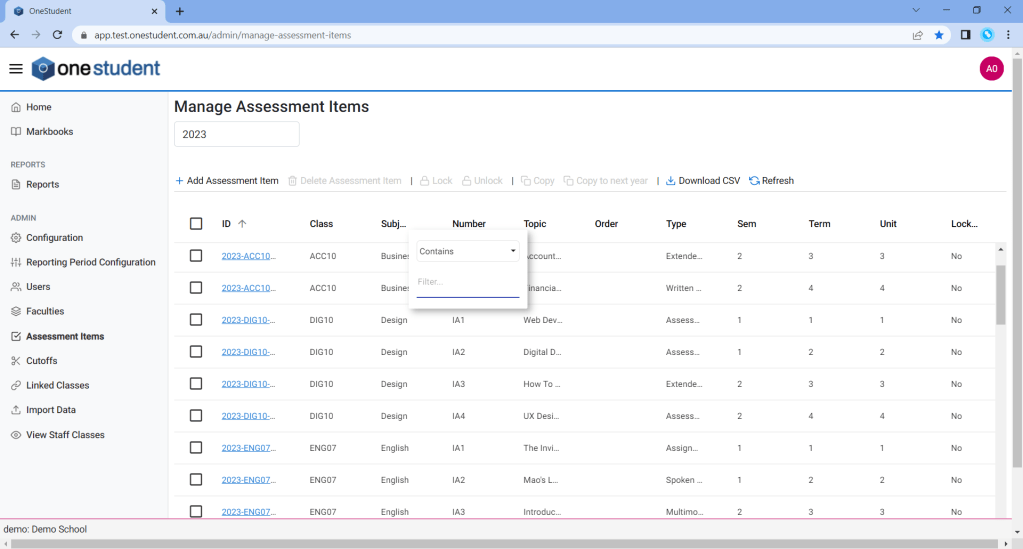
Assessment Items
The Assessment Items page allows the Administrator to manage the list of assessment items for each subject. The assessment items are included on the markbook page, and a mark is given to each assessment item criteria.
The options available are:
- Add Assessment Item.
- Delete Assessment Item.
- Download CSV.
- Selecting on the individual assessment items to display the assessment item profile.
Example of OneStudent – Assessment Items – Manage Assessment Items page:
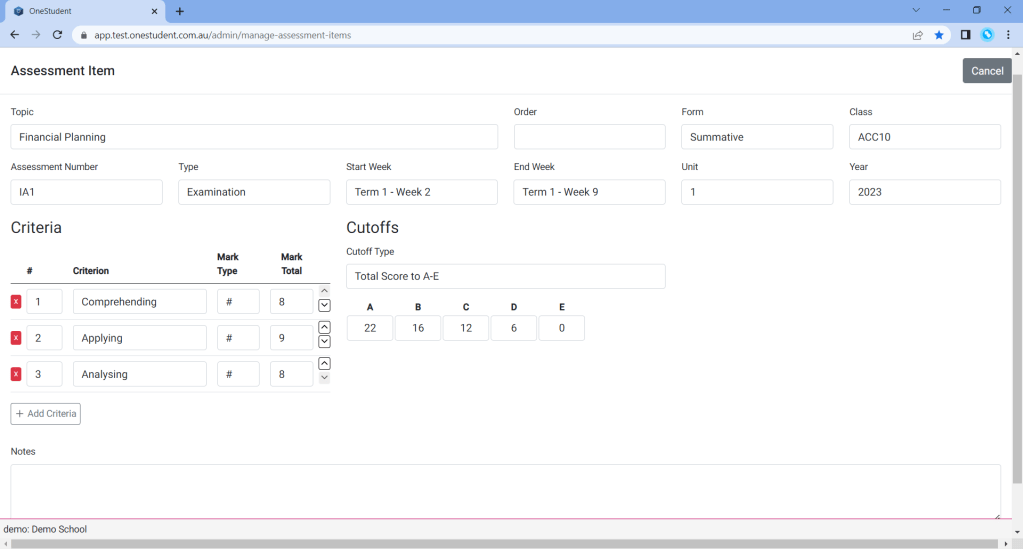
Examples of OneStudent – Assessment Items – Manage Assessment Items page with Assessment Items selected (Assessment Item Profile):

Cutoffs
Cutoffs are used in the Cumulative report, they can also be used to override the grade given based on a percentage value.
Each assessment item is assigned a cutoff, and by default the hardcoded percentage values within OneStudent are applied.
In the cases that the default percentage values are not relevant, then a Cutoffs can be assigned to an individual year-level or class-code. Any individual year-level or class-code Cutoffs set will override the default percentage values.
Note: That, if no individual year-level or class-code Cutoff is set via the Cutoffs page then the default hardcoded percentage values will be applied.

Linked Classes
Linked classes are used in the QCAA upload report. If classes are configured via the Linked Classes page, then QCAA upload report will includes students and results from the selected class and any linked class.
For example,
Linking Music extension for year 11 MEX11 and Music from year 12 MUS12 = MUS12 -> MEX11.
If you completed a QCAA report for MUS12, you would also get results for MEX11.

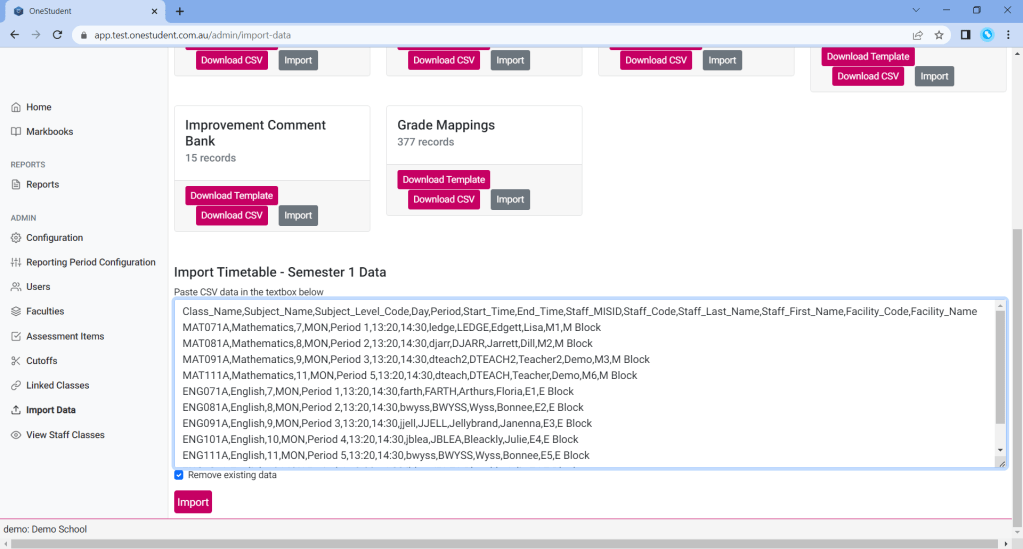
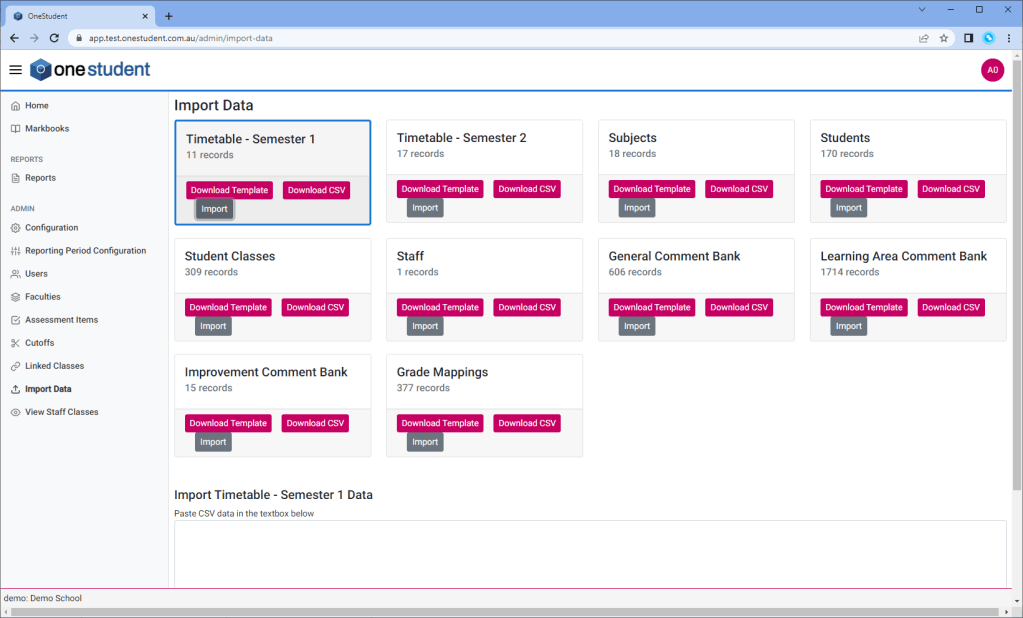
Import Data
The Import Data page allows the Administrator to manage data to be uploaded into OneStudent from another system (i.e. OneSchool), such as students, staff, timetable and classes.
The Import Data types are:
- Timetable – Semester 1
- Timetable – Semester 2
- Subject
- Student
- Student Classes
- Staff
- General Comment Bank
- Leaning area Comment Bank
- Grade Mapping
The options available for each Import Data options are:
- Download Template:
- which can be used to establish data in the structure required for OneStudent.
- Download CSV:
- which will download the current associated data for the selected option within OneStudent, which can be used to manage the data.
- Import:
- which can be used to import CSV data for the selected option using the text box on the Import Data page.
Example of OneStudent – Import Data page:
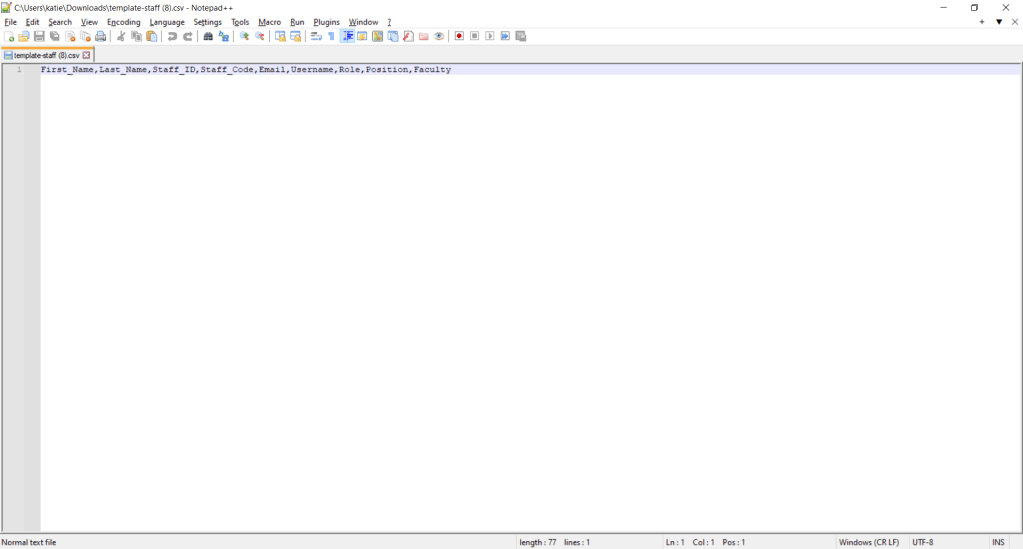
Example of OneStudent – Import Data page – Download Template option (Staff) in Notepad++:
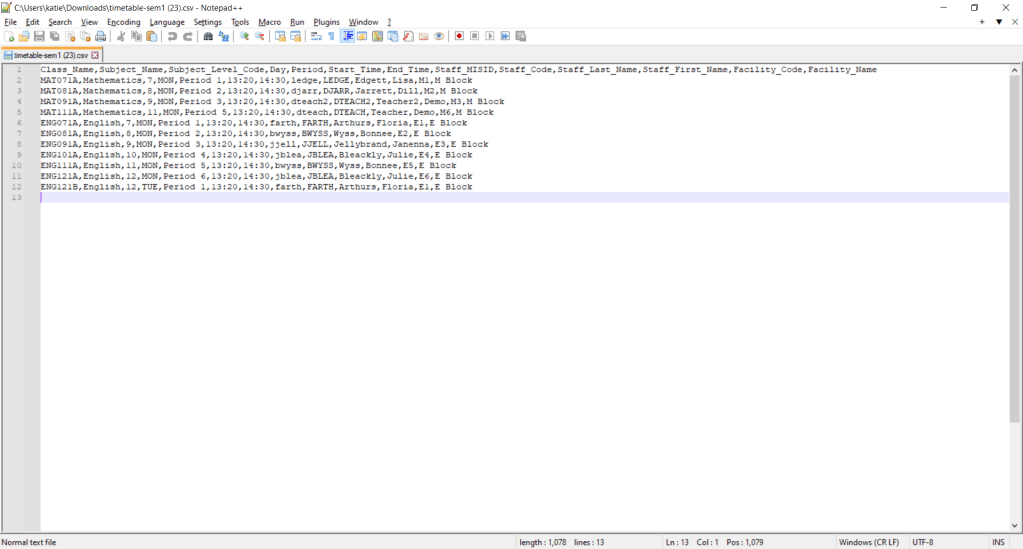
Example of OneStudent – Import Data page – Download CSV option (Timetable) in Notepad++:
Example of OneStudent – Import Data page – Import option selected (Timetable):
Example of OneStudent – Import Data page – Import option selected (Timetable) – Import Timetable – Semester 1 Data, with data ready to Import: